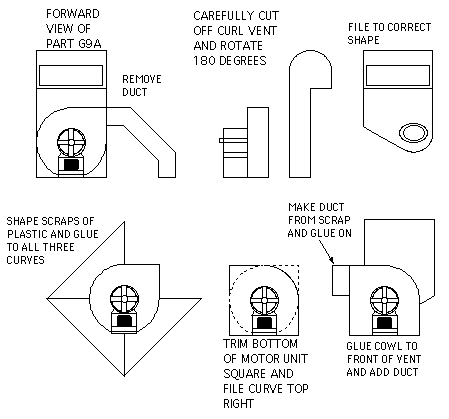
Remove
the 45 degree duct from the unit's side and the
gluing tab from the bottom of the vent.
This
vent can be used as is with a new duct on the starboard
side or you can make the following modification.
- Cut
the whole curl vent from the the motor unit. i.e.
the cut should be up and down behind the motor
unit. Reshape the bottom of the curl vent as seen
in the diagram right.
- The
curved style of motor unit is incorrect and needs
to squared up.
- To
square up the bottom curves take a piece of scrape
plastic the same width as the housing or slightly
greater (Evergreen 2mm sheet works well).
- Cut
a small square approx. 7mm x 7mm and then cut
this in half diagonally. Then file a curve in
the centre of each diagonal. Keep testing them
against the curves of the vent until you get them
just right, then CA glue the curve of the vent
to the hollow in the plastic triangle.
- When
dry trim off the excess plastic and file square.
- Glue
the curl vent onto the motor unit with the curl
facing forward.
The
vent needs to be moved forward from the location
marked on the Deck by half the distance that the
vent's bottom is thick. This reason for this is
that a smaller curl vent needs to be added behind
this vent so you need to make room for it.
Make sure when you glue the vent to the Deckhouse
roof that the back of the vent covers the hole
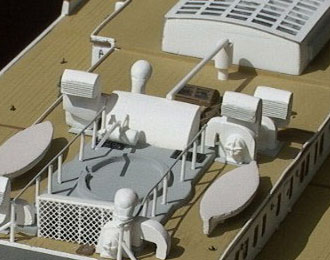
the tab would have used. Model Image.
|